
Tips and tricks for your project
These are the tips I forgot to put in the original notes. A few letters from friends around the world pushed me to write them down.
Aluminium conductor foil
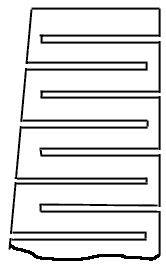
This has been one of the hard parts of the project. How on earth do you cut a perfect strip of aluminium foil that is also very fragile, and then stick it on the membrane without a fight?
This is not my own idea, but I used it successfully on my model. In Chile there is a paper used for chocolates. It is waxed paper with a very thin aluminium foil on one side, much thinner than the foil used for food. The only real problem was finding a sheet large enough for the whole design in one piece.
I had to go to Santiago, then to a packaging plant. They did not sell the material. No surprise. In the scrap I found 10 to 15 meters of it, enough for the project and a bit left over. The man there could not believe I was going to build a loudspeaker with it. He gave me his address so I could send a picture. I never did. If he has found this site, and if he cares, here it is.
In Denmark this paper is used to wrap sandwiches, the Danish smørrebrød, and you can buy it in the right width at an ordinary supermarket. Lucky them. If you live somewhere else, you will have to hunt for it. It is worth the hunt.
Once you have it, this is the method:
- Draw the membrane design on the foil.
- Stick two very sharp blades together, separated by a small coin or something of the same thickness. Align them carefully.
- Cut the aluminium covering without cutting the paper underneath. Control the pressure. Do not do this after a long night or a party.
- Peel away, very carefully, the thin strip between the blades. With some sweat and patience you get the whole design on the supporting wax paper, with strips closer and cleaner than you could manage by sticking loose aluminium strips onto the plastic.
- Stretch the plastic membrane on a table and tape the edges. Spray the adhesive, then stick the aluminium side onto the plastic. Flatten it and take out the wrinkles with care. The supporting paper is wet from the spray, and wet paper tears. That happened to me, and it killed one membrane.
- Take the paper off without taking the aluminium with it. This is where the wax helps. Use a hairdryer on the hot setting until the wax melts, then pull the paper away. This part is delicate too, and quite a bit of fun.
I like this much more than the tedious method of sticking a loose aluminium strip straight onto the membrane.
The membrane material
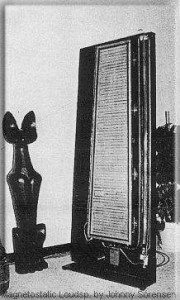
On the first model I used a rather thick Mylar membrane my brother had for windsurf sails, around 50 micrometers. Later I used a gold-coloured sticker material of about half that thickness.
On the second model I used what the original design recommended: two slit oven bags. I did not test them first. The surprise was that the speakers became gigantic hygrometers. I could predict bad weather by looking at them. They went limp and stretched on sunny, dry days.
Test the membrane material for humidity before you use it. Stretch a piece over a frame, take it into the bathroom, turn on the hot water, and see if it goes limp. If it does, change the material.
I have since bought a roll of 12 micrometer Mylar for the next model. Mylar is a tough material, and the first model had already shown me it was worth using.
The adhesive glue
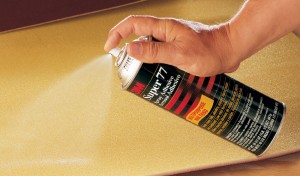
3M Super 77 Classic Spray Adhesive
This problem is easy to get past if you use a good spray glue. I am giving 3M free advertising here. It comes in a black can: Super 77. Follow the instructions, use it sparingly and evenly, and practice on something you can throw away before you touch the real membrane.
Practical tip: unused conductor
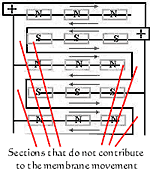
Once the membrane is designed, you will notice sections that only connect the conductor runs between the magnet poles. Those sections do not move the membrane, so they do not need to sit between the poles. Put them outside the stretched film, on the MDF plate. The part that does the work stays suspended between the magnets, and the dead weight is lower. That helps the efficiency, at least a bit.
That is all for now. If I remember more, I will add it.